Whether you are using an document generation tool like Docmosis, or just preparing a Microsoft Word document that you will fill in by hand, here are some tips for making a reporting template that is easy to work with.
The goal when building a good reporting template should be: If you change or add information anywhere in the document – the layout of subsequent items or pages should remain as you expect.
These tips apply specifically to Microsoft Word (Word 2010) documents, but the concepts can be used in any report.
Below we will examine the use of paragraph, page, and table properties to control document layout.
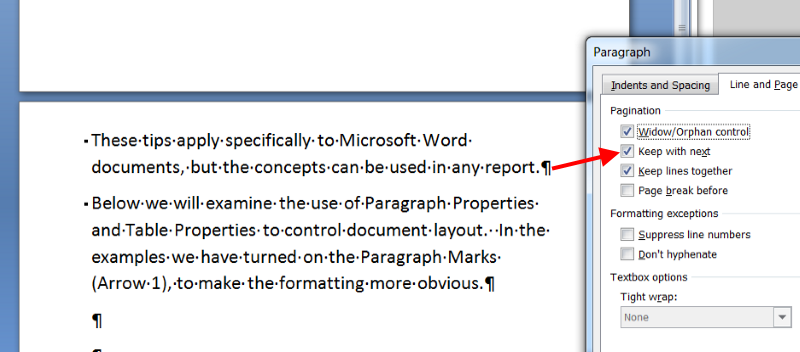
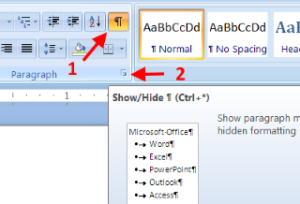
In the examples we have turned on the Paragraph Marks (arrow 1), to make the formatting more obvious. You can access paragraph properties by clicking at arrow 2.
PARAGRAPHS and PAGE BREAKS
Paragraphs flowing over pages
- Keep Lines Together
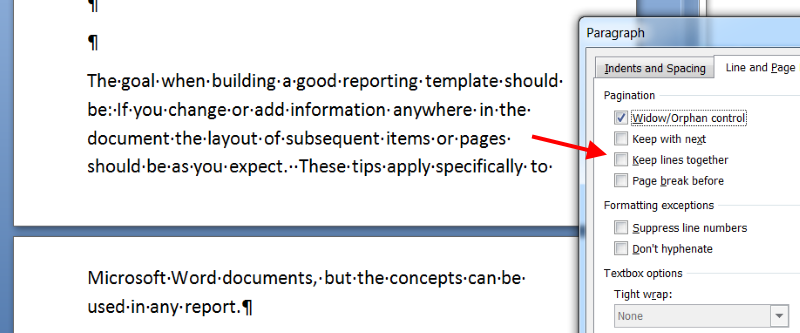
A paragraph at the bottom of a page can flow over to the next page. This can make a document feel disjointed.
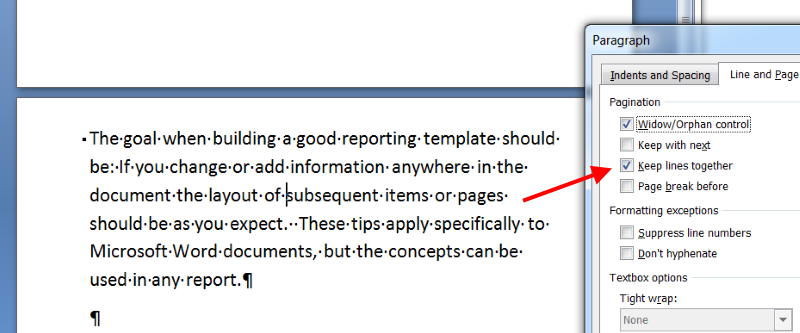
Consider using the property “Keep Lines Together”, so that if a paragraph spills onto a new page it pulls the start of the paragraph with it.
Here’s a before and after example:
- Before
- After
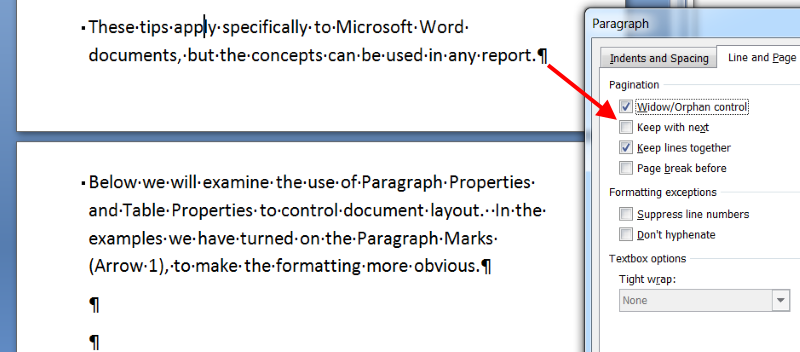
- Keep With Next
Sometimes two paragraphs should appear next to each other, for example: if they are related clauses of a legal document. By setting the “Keep With Next” attribute of the first paragraph, it will be pulled on to a new page by the second paragraph, like this:
- Before
- After
This property is very useful within Tables, for keeping the whole table together, as we will see below.
Page Breaks
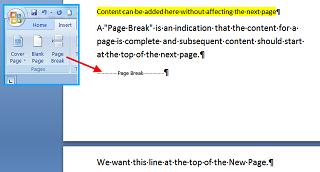
We often see report templates where multiple carriage returns have been used to force a paragraph on to a new page.
The problem this causes is that the carriage returns will move up and down as the content above changes, inevitably leading to blank lines where you don’t want them.
A “Page Break” is an indication that the content for a page is complete and subsequent content should start at the top of the next page.
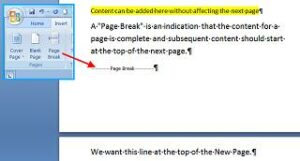
If you do add more text above the page break it won’t push the subsequent paragraphs further down. Instead, the page break will “absorb” the additions. Subsequent content remains where it should.
TABLES
Use Tables for alignment
Tables allow you to control alignment of related pieces of information. Tables are much better than using consecutive spaces or tabs to layout information. You can always turn off the borders if you don’t want it to look like a table.
Microsoft Word allows you to set table properties like:
- Header Row
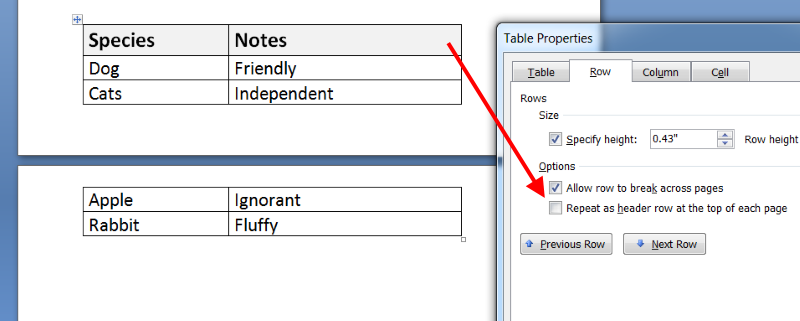
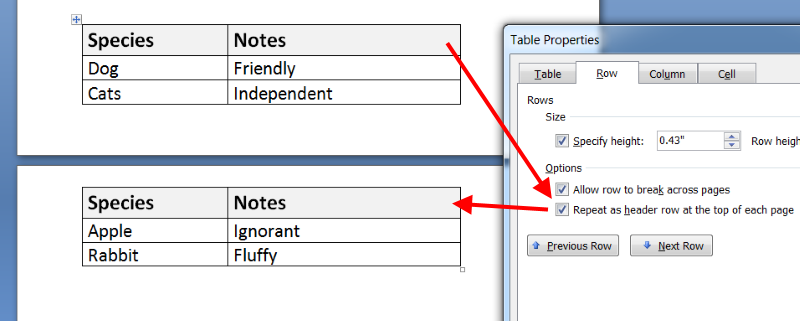
Sometimes tables have a leading row that should always appears at the top of the table. If the table breaks to a new page then that first row should appear at the top of the table on the next page as well.
You can control this in table properties by setting “Repeat as a Header Row…” like this:
- Before
- After
- Keep With Next
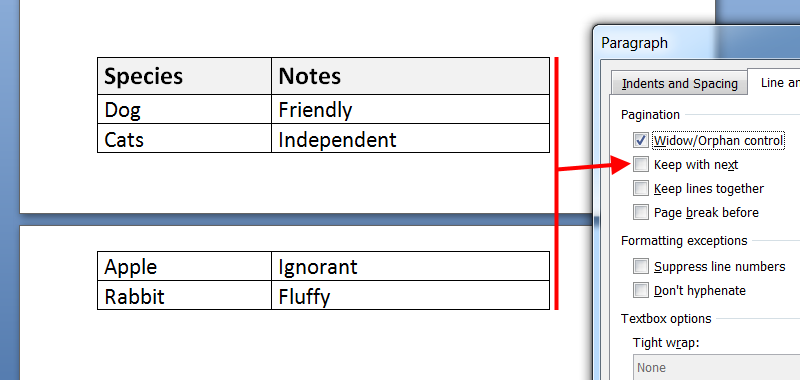
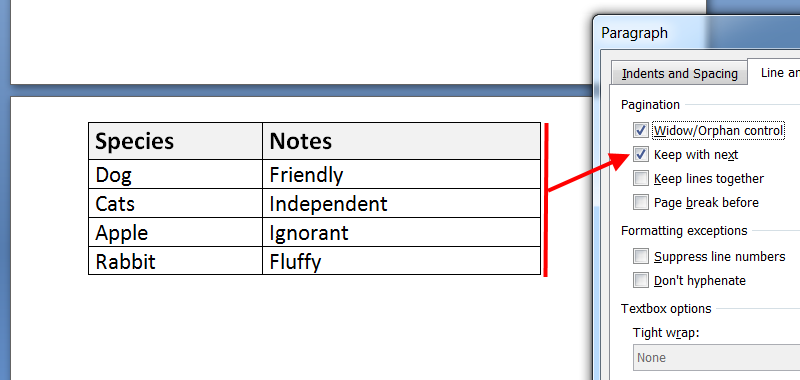
When using a table, it can be appropriate for the entire table to stay together. If a table runs on to a new page the information can become harder to understand if you are comparing items in the table to each other.
By setting the paragraph property “Keep With Next” for all of the rows you can ensure that Tables will not unexpectedly split across pages.
Summary
By understanding and using the features above you can structure your reporting templates so that they behave in a way you expect – especially when content is added or updated.
Docmosis is a template based reporting tool that allows you to build templates by adding placeholders in the document for any dynamic content.
By using techniques above you can control the layout of your report, so that it’s independent of the data your report contains.
Related Links
